Wednesday, June 30, 2010

Red Rock Canyon LO

Hi Everyone! Here is a layout I made using Opposites Attract, Graphically Speaking, and Once Upon A Princess cartridges, along with my beloved Gypsy.

The papers I used are Bo Bunny and Stampin' Up's Chocolate Chip. I ripped a piece of Chocolate Chip paper to look like mountains behind my title. I used my Gypsy and Opposites Attract font to weld the title together.  I wanted to add more dimension so I embossed the title with the Cuttlebug folder "Diamonds in the Rough" and then swiped Tim Holtz's "Tea Dye" distress ink over the top of the letters. Next, I popped the title off of the page with 3D-Dots .

I also wanted to add a spot for journaling, but I didn't want it to take up a large space on my page. So, I used my Gypsy and 2 oval tags from Once Upon A Princess and welded them together. Then I used my Scor-pal so that I would have a nice clean fold.
I put all of my journaling inside and added a "U R Here" saying from Graphically Speaking on top.
I really like the color combos on this page! The reddish/orange with the light blue and brown really look like Red Rock Canyon to me! :) Well, that's it for today. Hope to see you again tomorrow!

Monday, June 28, 2010

Christmas LO using Celebrate w/ Flourish

Yes, I know I am behind but I am trying to do something about it! :) I used the NEW Cricut Lite cartridge Celebrate with Flourish. This cartridge is fantastic! It really adds a lot to your pages! Here are the pages (I hope you can see the "true" LO with all the paper covering our pics! Not all of my LOs will be covered, I promise!) On to the pages...
I used Recollections cream paper for the background and all of the other paper is Making Memories Fa La La La collection (I loved this paper so much when I saw it, so I bought a TON and am finally using it up).
The "Merry Christmas" saying was cut at 3 1/4". I love that I was able to use 4 different papers for this, it really helped to tie the title in with the rest of the paper/page!
The poinsettias are also on this cartridge and were cut at 2 1/2". I also added scraps of ribbon to some of the pictures. I think the cream "ruffled" ribbon is adorable (Shout out...Thanks Cerin for sharing this cute ribbon with me! I LOVE crops because if you don't have something, one of your friends probably does!) Then I added a thin piece of brown ribbon on top.
We had 2 Christmas cards this year. One I made online and another one that my mom had made of my Little Pickle at a photo studio. I wanted to be able to put both of them on the page, so...
I cut a piece of card stock to fit and folded it in half. I glued the Pickle's card inside, and our family card to the outside. I also added a band of the matching "ruffled" ribbon and brown ribbon.


I also added a little bling to the middle of each poinsettia! If you haven't scrapped your Christmas pictures yet, I hope you were inspired to get them out and onto paper! Thanks for stoppin' by! Happy scrappin' wishes to you!

Friday, June 25, 2010

You and Me card

I just LOVE the new Slumber Party cartridge! I mixed this card up and threw on a saying from the new Lacy Labels cart too! This would be make a great Valentine, but since it is almost my anniversary--I thought it would make a perfect card for my hubbie! Shout out...Happy Anniversary, Honey! Thanks for putting up with 9 years of my crafty messes! I LOVE you tons!
The base of the card is 5" x 10", and folded in half. I used a piece of Recollection's cream colored paper for the base and the scallop of the heart. The background paper is from K & Company, and was cut at 4 1/4". The heart was also cut at 4 1/4", and I used pink scraps. The "You & Me" saying was cut at 5 1/4", and I used Stampin' Up's Chocolate Chip paper and satin ribbon.
I used 3D-dots to "pop" up the heart, and cut small pieces to "pop" up the saying. Then  I added some Cinnamon Stickles for the BLING effect!
I will not be posting tomorrow because I will be a at ALL day scrapbooking event! Yippee! Keep your fingers crossed for me that I will get a LOT done! :)  Have a great Friday!

Thursday, June 24, 2010

So Cool Card using NEW Slumber Party & MPS Punny-licious Stamps

Hello everyone! So, I've had this card idea in my head for almost a week now, but with a 7 month old at home it's been a little challenging getting my craft on. (Make a card or take a nap with the baby, hmm?? What would you chose? P.S. She's REALLY cute!) On to the card:
I LOVE this card! Honestly, I used ALL scraps! As the title states I used the New Cricut Lite Slumber Party cartridge, and My Pink Stamper's Punny-licious stamp set. (It was a toss up between "What's Up" or "So Cool")
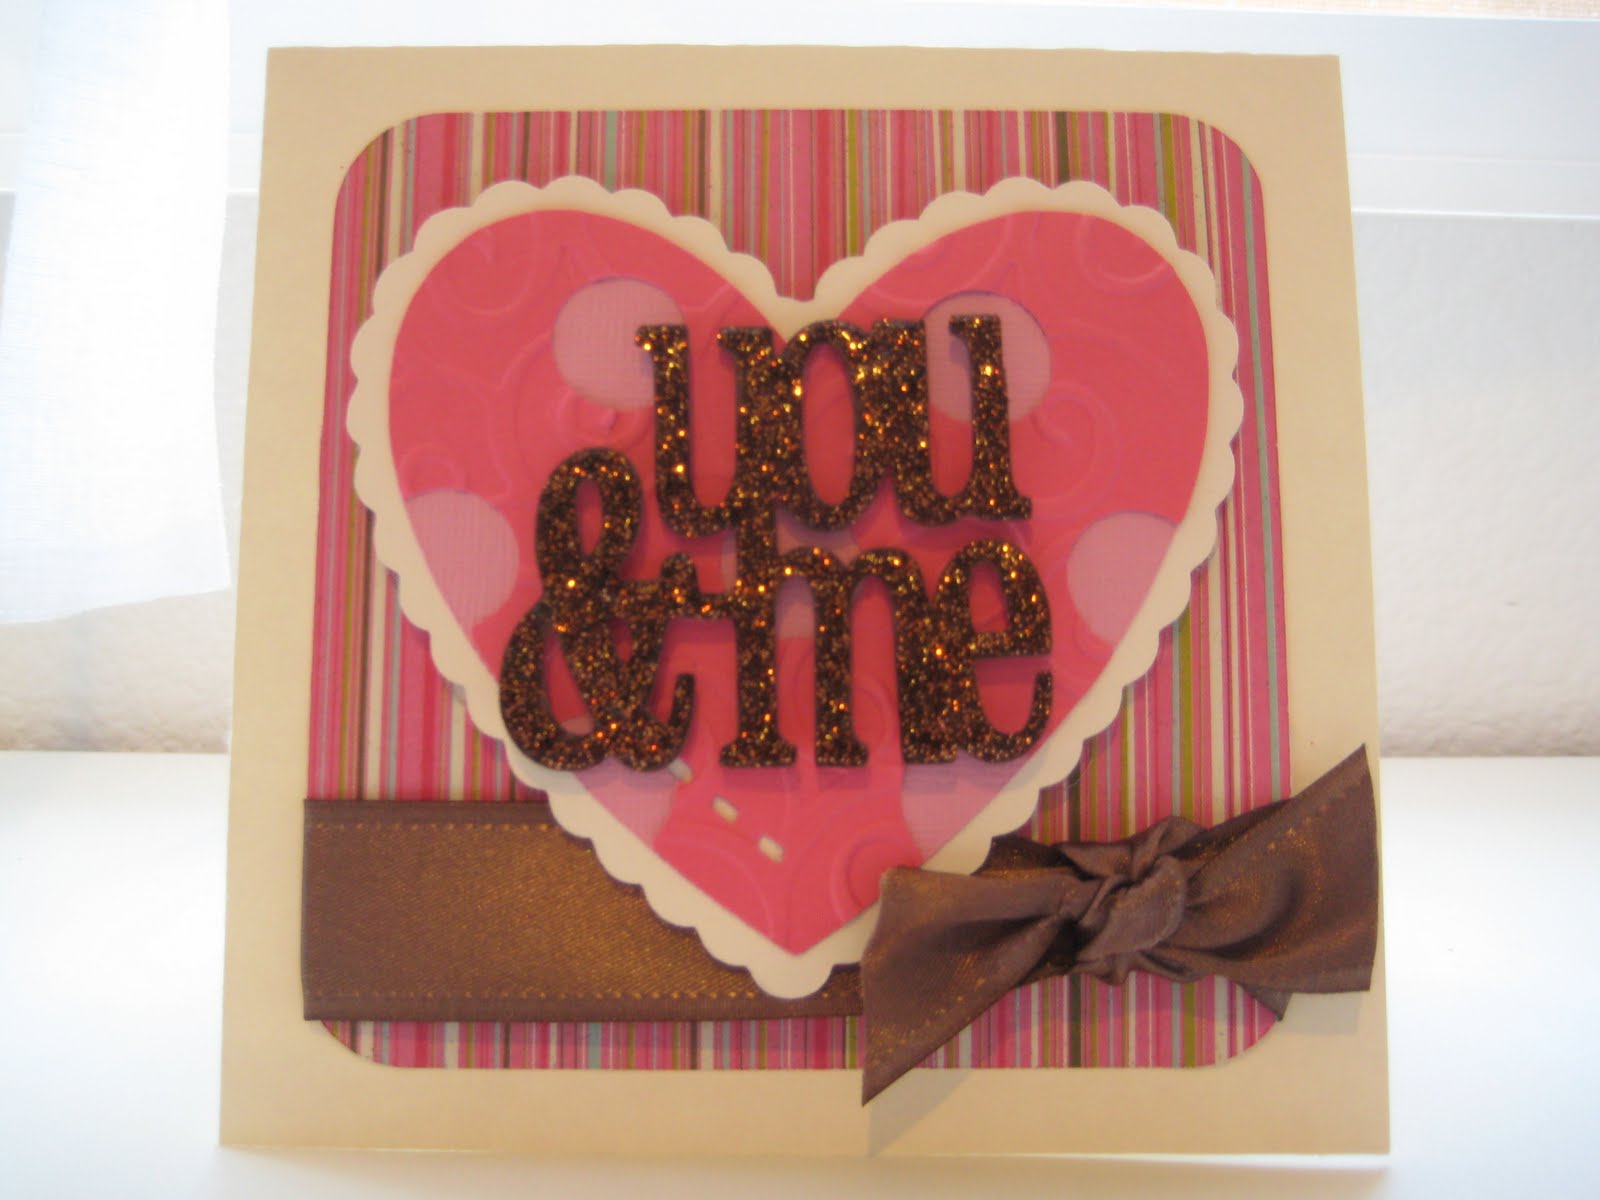
This card is a 10" x 5" piece of card stock folded in half. The skull and all her pieces were cut at 4 1/4".
I used the Cuttlebug folder "Skeleton Scroll" to emboss the darker pink background paper, and "Diamonds in the Rough" to emboss her cute light pink bow. I popped up the bow, eyes, and skull with 3D-Dots and dimensionals. Of course I had to add BLING with black stickles on the eyes, and a silver rhinestone in the middle of the flower!
I wanted to do something different and edgy with the ribbon.
First, I put down Glue Dots "Glue Lines" (I always use this for my ribbon). Next, to make a ruffled effect, I fanned the ribbon back and forth onto the glue lines. Lastly, (for a "So Cool" effect) I stapled the ribbon down.

I hope you enjoyed my card today! I am attending a scrapbooking event on Saturday and I am crossing my fingers that I get a lot done. Hopefully, I will have some new pages to show you soon!
P.S. I think it's "So Cool" that you stopped by today! :)

Wednesday, June 23, 2010

A Little Bird Told Me Card

I made a set of cards for my Room Moms this year as an end of the year gift. I  put them in a Stampin' Up cello bag and made a topper that said, "Thanks for BEE-ing so helpful this year!". I also popped up a cute little bee from Create a Critter onto the topper. Here is ONE of the cards from the set:
I used Create a Critter for the cute little bird, and Just Because Cards cartridge for the saying.
This card is 4" x 5 1/2". The background paper is from a K & Company paper stack, and was cut at 3 3/4" x 5 1/4".

The bird was cut 3", but I found that the wing fit better if it was cut at 3 1/4". The saying was cut at 5 1/4".

The brown paper is Stampin' Up's Chocolate Chip, and the yellow paper and ribbon is So Saffron. The blue papers, and cream strip are all scraps from my scrap folder (Ever since I organized my scraps by color in an accordion file folder, I find myself using them all the time now! Shout out...Thanks Christianna for introducing this fantastic organizational idea to me! I can't wait to help you organize your new craft area-I'm keeping my fingers crossed for ya!)

I hope you all have at least a little time to craft today!     See you tomorrow :)

Tuesday, June 22, 2010

Tea Party Card with Once Upon a Princess

Happy Tuesday everyone! Here is a card I made using the Once Upon a Princess cartridge. When I saw this cart I just knew I had to have it! I thought of my little Princess, right away!
All of the cuts are from page 61. The papers and ribbons are from Stampin' Up. The flower is from a pack that I got at Robert's in St. George, UT. (Have you ever been to Robert's? If you get a chance to go, it's a must! Shout out to my friend Jamie M. who introduced me to Robert's! Where would I be without you?!)
Back to the card...I used the Cuttlebug folder Divine Swirls to add some texture, popped up the teapot and heart on the envie, and of course added some BLING! :)

Time for another shout out....This Thank You card was made for one of the amazing moms and daughters that I was blessed to have in my class this year! Thank you Laila and Stella for taking my Little Princess and I to the Mother's Day Tea at Springs Preserve! This was an event to raise money for Child Focus, an organization that does AMAZING things for foster and adopted children here in town.
(Don't worry I give this to her at the Tea! I know I made it in May, but I still wanted to share it with all of you!) Happy crafting!

Monday, June 21, 2010

Family Time Scrapbook page

Thanks for stopping by today! Here is a super fast scrapbook page that I put together:
The "family" letters were cut using Hello Kitty font (Don't you just love that font?!) and shadow feature. I "popped" up the word family with 3D-dots. The "time" letters were cut using Wild Card (if you are looking for a font that welds like butter, this is the one!). The background paper is from My Mind's Eye, and the arrow is from Scenic Route. The "lacy" paper is a piece I picked up at Micheal's, and all of the white pieces are from scraps. The green is Kiwi Kiss, and the blue is Baja Breeze from Stampin' Up. And of course I added some BLING!

I'm working on a super secret project right now, using the NEW Cricut Lite Slumber Party cartridge. I promise to share it when the time is right! :) Have a great day!

Sunday, June 20, 2010

SO "Super Tweet" Card with Cherry Limeade cartridge

First of all...Happy 1st Father's Day to my hubbie!!!

Here is a card I made using the NEW Cherry Limeade cartridge and My Pink Stamper's "Punny-licious stamp set (These stamps are ADORABLE and go perfect with the Create a Critter cartridge and more!).
How cute is this little Birdie?!! I LOVE the font on this cartridge!

This is a larger sized card and measures 4 3/4 x 6 1/2. The white frame is from the NEW Lacy Labels cart. It is the "To/From" Label and was cut at 3 1/2". The rest of the cuts are from the NEW Cherry Limeade cart (which I just LOVE!!!). The word "So" was cut at 1". The bird was cut at 3 1/2". The flower is from the "whole lime" button. The pink and yellow parts are cut at 1 3/4" and the white at 1 1/4" (I just wanted to add some more dimension and color). The papers were all cut with scraps that I had, but I do know that the pink is Stampin' Up's Pink Pirouette. I used the Cuttlebug Divine Swirls folder to emboss the pink and white part of the flower, and the Swiss Dots folder for the yellow part of the flower. I added yellow Stickles (gotta love the bling!) to the yellow parts of the cute little birdie. The ribbon is from Michael's.
I hope you all had a great weekend, and even got a little crafting done! Have a "Super Tweet" night!

Saturday, June 19, 2010

Stationary set using Storybook cartridge

OK, so I totally cased this project from Angie Kennedy Juda (I just LOVE her ideas!). I changed it up a little by using my handy dandy Cricut and the Storybook cartridge (instead of using stamps).
 Here is her video for the Card Portfolio, and here is her video for the Monogram Notecards. I did use the Stampin' Up scallop punch, and 1 3/8" circle punch. I cut the monogram out using Storybook (basic font) at 1 1/4". There are two scallops on the cover. One is with the Stampin' Up scallop punch, and the other is the Storybook letter "I" FLOWER using shadow/shift cut at 2". These make fantastic gifts!
Shout out time...
*The 1st one was made for my friend Krista for her birthday! Happy bday to you, Krista!
*The 3rd one was made for my Room Mom this year, who has also become a dear friend! She watched my Little Pickle (my baby girl) every Wednesday, and even some Thursday mornings while I was working and teaching her big girl! Jamie, I can not say "THANK YOU," enough! You are amazing!
*The 2nd one I made for Jamie's Mom. She was out here visiting, and helped take care of the cute Little Pickle on a Wednesday. I had given Jamie hers and her Mom just LOVED it some much, that I made her one also--to say "Thanks for lovin' on my baby!" :)

I would LOVE to see how any of you out there would "change" these up and make them your own! If you make one please leave a comment with your blog info so that I can hop over and check it out! Let the paper scraps fly....

New Cricut Lite cartridges...SCORE!

Ohhh...I can't wait to play!!!!
WINNER! WINNER!
So I went to a fundraiser on Tuesday night (Thanks Kel for inviting me!) and bought raffle tickets to support the cause. They were giving away rounds of golf, restaurant gift cards, and more. Well, guess who won...ME! And guess what I won? A gift card to WalMart....a $100 gift card at that!!! Guess what I am going on a hunt for tomorrow more like all week?? Cricut Lite cartridges! Yippee! I am sprinkling my good luck your way, my crafty friends!
Shout out to MuffyK from the cricut MB...Thanks for your help in tracking down Cherry Limeaded! :)

I hope to have new projects using these carts posted soon!

Thursday, June 17, 2010

Thank EWE card

Here is a quick card I made using Create a Critter and Just Because cartridges.
The "Thank EWE" is from Just Because Cards cartridge and the cute little lamb is from the Create a Critter cartridge. The pink paper is from Stampin' Up. The gray swirl paper is a piece from the DCWV Luxury Stack. The white and black pieces on the lamb are scraps. I used the Divine Swirls Cuttlebug folder on the "wool," and of course popped her up with 3D-dots. The ribbon is from Michaels.
Time for a shout out...
I made this card for someone who is like a sister to me, thanks Christie for all you and your family have done for me!!!

I am working on some scrapbook pages that I hope to have done soon, and then I post them. Have a great Thursday everyone!

Wednesday, June 16, 2010

Father's Day card using NEW Cricut Lite Lacy Labels & Wild Card Cartridges

Hi Everyone! Here is a Father's Day card I made using the NEW Cricut Lite Lacy Labels, and Wild Card cartridges.
Using the Lacy Lables cartridge I cut the "All Boy" label at 3 1/2 inches with K&Company paper. The layer was also cut at 3 1/2 inches with a scrap of cream (I love to use my scraps). The "Happy Father's Day" phrase was cut at 8 inches using the Wild Card cartridge and Stampin' Up Chocolate Chip paper. You can find the "HFD" phrase on the Wild Card cartridge row 4 number 5. I also used the Cuttlebug folder Diamonds in the Rough to give the "HFD" phrase some more dimension.
I then added ribbon,  popped up the phrase, and popped up the label on front of the card.
I hope I inspired someone out there, to get up and make something! :) Happy crafting!

Tuesday, June 15, 2010

Finally!!!!

I am finally a part of the blogging world! I love to craft and create, especially using my Cricut Expression and my Gypsy! I can't wait to share my creations with all of you, my fellow crafty friends!
And hmmm....I'm sure you are all wondering why I named my blog "Craftin' on my door?!" Well, because that is exactly what I do! My fantastic hubbie made me a LARGE crafting desk out of a door! He added Plexiglas to the top and we used the cubes from Michael's as the legs. I LOVE it! Here is a picture of my Crafty door...
And here is a picture of my Cricut workstation...
I will be posting pictures of projects soon! Thanks for stopping by and I hope to see you again soon! :)