Monday, May 30, 2011

Thanks to our Troops!!!

Hello my crafty friends and Happy Memorial Day to you! We returned from our trip this afternoon and in the spirit of Memorial Day I decided to make up some cards for our troops:


I made 30 cards to send out to our troops!


I used the Stand and Salute cartridge and cut the USA at 2". Then I used the "stars" Cuttlebug folder to emboss the USA. I used a couple of different papers for the background, attached the USA, stamped "thank you", tied twine around the top, and used foam dots for dimension.


THANK YOU to all who have, do, and will serve this amazing country that we live in! And thank you to all the wives who have husbands that serve! I feel so blessed to live in the USA! <3 Kristy

Sunday, May 22, 2011

CJ Too Birthday Bash Blog Hop...

Happy Birthday Tracy!!! 
 Today is the fabulous Tracy from Craft Junkie Too's birthday!
Please join us for CJToo's Birthday Bash Blog Hop! You can start HERE.
                                         
Hello my crafty friends! I had to go back and show a little love to my old Expression. I heard she was feelin' a little left out since the New E2 got here! :) Here's a quick post showing a birthday card I made for one of my friends.

I used the Birthday Bash cart to  cut out the sundae and all the layers (I cut out almost all of the layers 2 times). I {love} cutting extra layers and putting 3D dots in between for more dimension.

I also inked around the edges.
I HAD to use some Glossy Accents for the cherries!
Used my Xyron, put the pieces upside down, and then "sugared" them with glitter!
I used my tweezers to get all the sticky glue webs out of the holes and corners.
Then I "sugared" the top layer pieces with different colors of glitter.
Here are the pieces inked, "sugared" and ready for layering!
Here are the sundaes with the first layer. I also used my white Jelly Roll pen to outline the dish.
I scored the card base. This size card fits into a regular letter type envelope.
Then I used pop dots to layer the "sugared" pieces.
I did the same for the cherries.
I added 2 types of tulle, a button, twine, and a sentiment to each card.
Here is the Blog Hop List. I hope you hop along with us...


I hope you enjoyed this layered, sparkly, and fun birthday card! I Hope you have a fabulous birthday, Tracy! <3 Kristy

Saturday, May 21, 2011

Blast Off into Summer Blog Hop

Hello my crafty friends and welcome to the Blast Off into Summer Blog Hop!

For this blog hop we were to create a project that expresses to students, teachers, or volunteers that they have done a great job this year.  Being a teacher I decided to put together a little teacher appreciation gift.
I chose colors and papers that could be masculine and used if your child has a "Mr." for a teacher! We don't have very many men that work at our school, but there are some! I'm sure there are some of us out there looking for a masculine type of teacher gift.
I started by using the American Alphabet cart that is loaded into the new E2. I cut each layer for the coffee cup at 9.50".
 I cut the last layer 2x's.
I glued the back layer to the mug to cover the heart.
Then I cut off the "swirls" and glued them together in order to make them more stable.
I glued all the "swirls" together.
Next I slipped the coffee gift card into the heart, used a couple of glue dots to hold it in place, and cut off the sides and bottom of the mug. This way this layer will be able to slide in and out of the mug.
Then I used one of the hearts that were cut out of the center of the mug, typed "pull up" on my computer, and used a SU punch to punch it out. I added some twine and glued it to the heart. Next I punched a hole in the heart, attached it with twine, a button, and a double twine bow.
Attach the front of the mug to the back of the mug, putting glue just around the edges. Then just slip the swirls inside the mug.
I also typed up a "Thanks a latte!" on my computer and printed it onto cream paper. Then add some twine, and attach with 3D dots and adhesive.
Here it is with the gift card showing...

Here's the list of blogs & the order 
Lynda- http://lyndascreativetouches.blogspot.com  

Thanks a latte for stopping by today! <3 Kristy

Wednesday, May 18, 2011

The New Cricut Blog

Have you seen the NEW Cricut Blog?
You can check it out here. There are prizes to be had!!!! <3 Kristy

Tuesday, May 17, 2011

The fabulous New E2!

Today's my day to be the guest designer over at She's a Sassy Lady. If you have a moment please hop on over and leave me a comment. Here's my post:

Hi everyone! This is Kristy from craftin-on-my-door and I want to thank Sheila for allowing my to be her guest designer again today! I look forward to my monthly She's a Sassy Lady posts! I decided to do something a little different this month. I thought that it would be fun to show you, my crafty friends, some of my favorite features of the New E2!
{LOVE} the LCD screen!
I find that the stylus is a little small for me so I use a larger stylus that you can buy for the Nintendo DS  ( I also use this for my Gypsy).
I love that there are 4 carts included!!!! I know I will enjoy them all, but I am really loving the American Alphabet right now.
My fav, fav, favorite thing has to be that you can see exactly where your image is going to cut on the mat. (I hope for an update that would allow you to move the images around the mat).
You can change the size of each image right on the mat.
You can add mats to your projects.
There are "cuts" programed in for different types of paper and materials. You can also make your own "custom cut" and save it to use each time you cut.
I also love the new mat "guide" feature. It holds your mat in place!
The "door" also has a rounder feature which sits higher on the table and holds your mat up.
It is compatible with cricut carts and imagine carts (it will not print but it will cut the pieces, and you can separate the layers on the imagine carts). It also comes with silicone covers...to keep out all those little pieces of flyin' paper!
I also love the little LED light. It shows where you are cutting. Sometimes even in the daytime there are shadows in my craftin' loft, and this little light helps day or night!
I LOVE that when you use your Gypsy with it, the "cut" choices are now on the G screen. You can pick the depth, speed, or multi-cut all at one place!
I canNOT wait to switch out my green side trim pieces for pink!
These are just a few of the new features that I {LOVE}! If you have the New E2 what is your favorite feature? If you don't have the E2 what feature catches your eye the most?

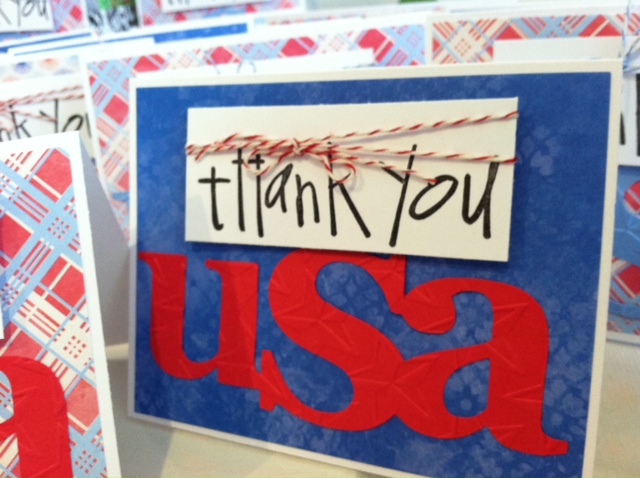
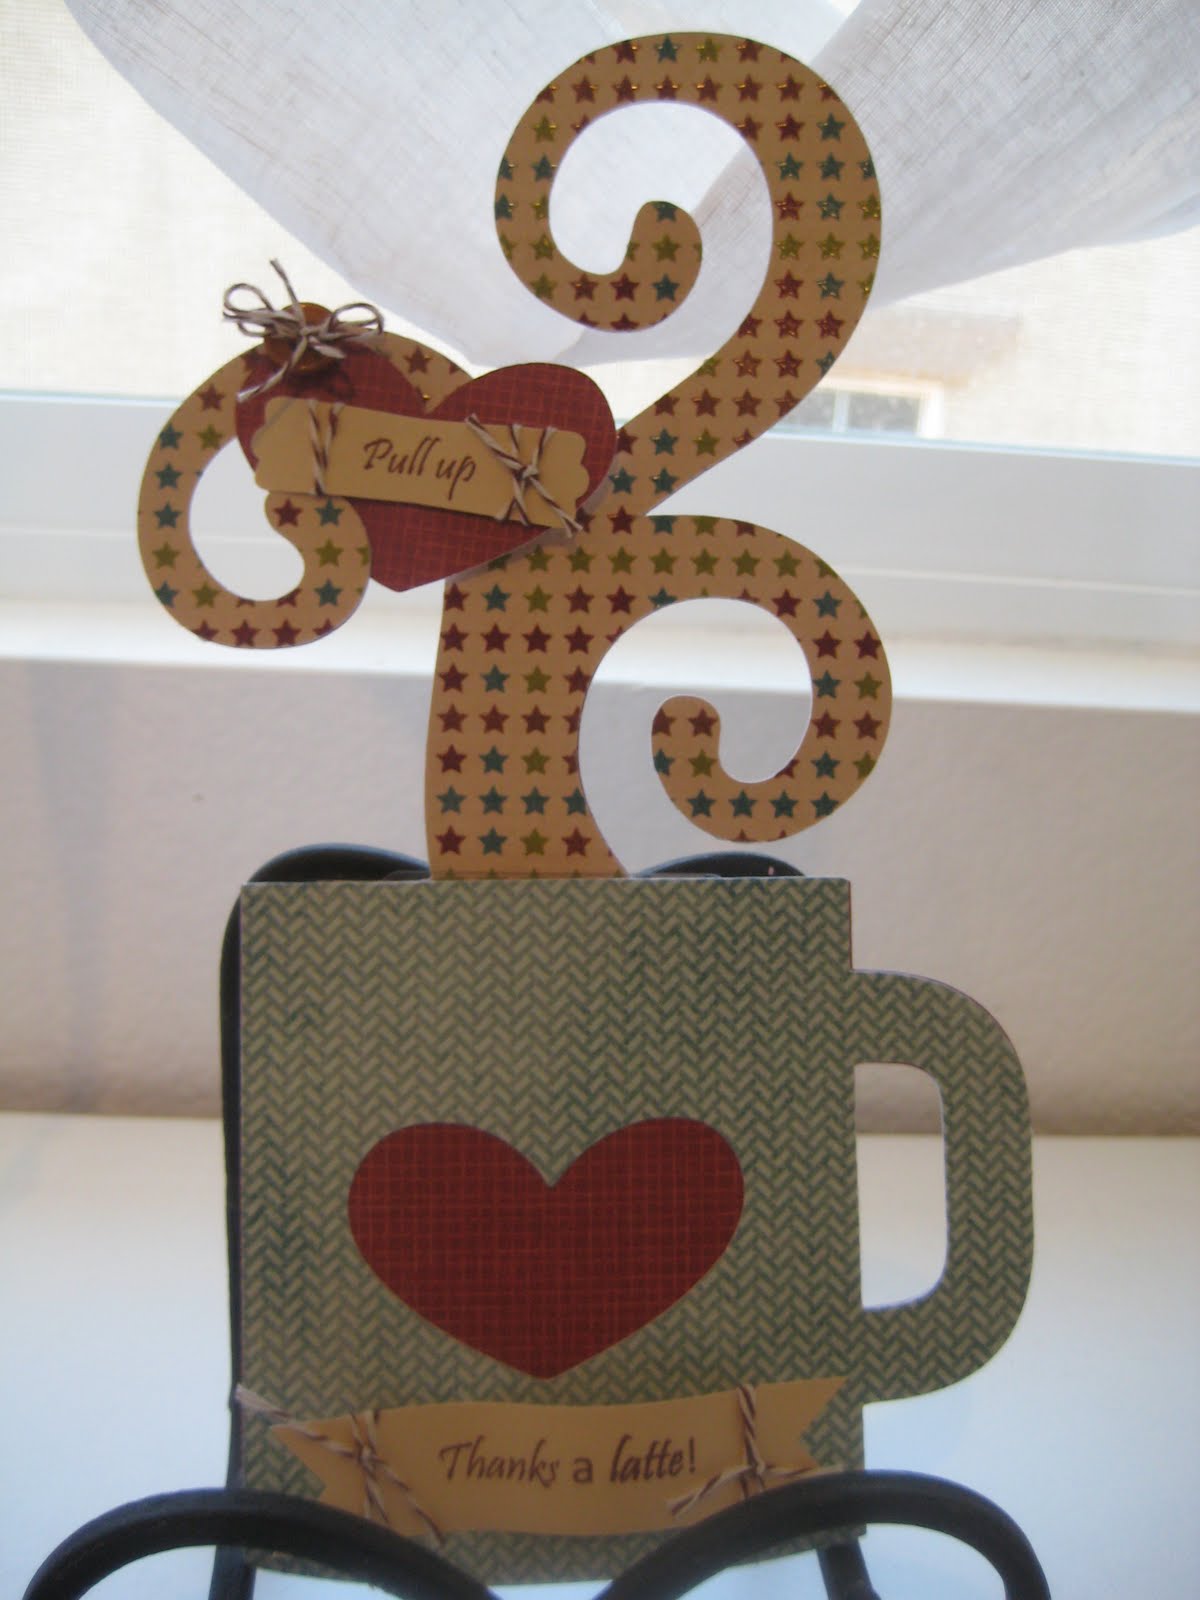
Here are some projects that I have made with the fabulous new machine:
Thanks for stopping by today! <3 Kristy