Tuesday, October 19, 2010

I love...Crepe Paper Streamers

This is my guest designer post for She's a Sassy Lady:

Hi, this is Kristy from craftin-on-my-door, and I want to thank Sheila for letting me be a guest designer again!

I am loving all things crepe paper! Yes, this party stuff below:

Here are a couple of cards that I made using this inexpensive party decor:

The skull card is just my fav! I used the Pumpkin carving solutions cartridge for both cards. The cards were cut at 5" x 10", then scored at 5", and folded in half. The pattern paper bases were cut using the Slumber Party charm at 4 3/4".

For the Jack o' lantern card:
Recipe:
White for card-Recollections
Orange Polka Dot-My Mind's Eye
Orange-Bazzill Tootsie
Yellow-Hobby Lobby

Black crepe paper-Hobby Lobby

Silver Tool-Walmart
The jack o' lantern was cut at 3.47". The yellow background was cut at 3.47" using George. I used the new Tim Holtz embossing folder, Notebook, to give my jack o' lantern texture. Then, I attached the orange and yellow pieces together using my super duper pink ATG gun! {POW} Next, I attached the crepe paper. I put adhesive around the edges of the square, and then fan folded the crepe paper back and forth.
Until I made it all the way around.
Tip...if the crepe paper sticks out too much, just give it a little trim with your handy dandy scissors!

I tied the silver tool around the top of my card. Then I used sticky backed Fun Foam to give Jack some dimension.
Just cut strips, and stack them on top of each other. For the last piece you can add adhesive to the plan side, and use the sticky side to attach to your card. Viola~
Just peel and stick to your card base.
For the skull card:

Recipe: White for card-Recollections
Purple Polka Dot-Hobby Lobby
White and Black-Recollections
Orange-Bazzill Tootsie
Flower-Prima
Bling-Micheals
The skull was cut at 3 3/4". The black background was cut using the Slumber Party "charm" at 3 3/4". The bow was cut using Rock Princess page 68 "layer-s" at 2 1/2". I attached the skull to the black background circle. Next, I added the crepe paper just like the jack o' lantern card (this one was much easier to attach because of the circle shape). I added sticky fun foam to the back and placed the skull onto the card. Then, I used a 3D dot to "pop" up the bow, added the flower and bling, and called it DONE!
I hope you enjoyed my super easy crepe paper tutorial! The possibilities are endless! I probably wouldn't use them on my scrapbook pages (because they are not acid free), but I will be using them on cards, decor, and more! I have some more Halloween cards that I will be adding to my blog soon! Thanks for the blog LOVE, and thanks again Sheila for having me! Happy Halloween to all of you! ;)
<3 Kristy

Sunday, October 3, 2010

Cricut Circle Blog Weekly Challenge

Here's the info straight from the Cricut Circle Blog:
Weekly Challenge #1: OOH, LA LA! FRENCH MANOR!
Pull out your FRENCH MANOR CARTRIDGE and create a project of your choice (card, scrapbook page, home decor project, . . . the sky’s the limit!). But here’s the catch, your project must also include JEWELS or PEARLS. Project must be newly created for this challenge and must include at least 2 cuts to qualify.

I have to admit that when I first received this cartridge it was not one of my favorites, but I started looking at the images in other ways and I have been waiting to make this card!

I saw the border on page 28 and immediately thought "pumpkins" or jack-o-lanterns! Then I used two other borders to make the "bats!"
I used my Gypsy to plan and arrange my images. Here's my mat after I cut everything out:
The base of the card was cut at 8" x 5 1/2", then scored at 4", and folded in half. I used the "bird stamp" on page 42 for the spooky frame. I turned the frame on it's side, unlinked the height and width on my Gypsy, and cut it at 3.68 w by 4.63 h.
The moon is a circle from George and basic shapes cut at 1.95 x 1.82. The "pumpkin" border is on page 28. I cut the border shadow and the border at 5.13 x 1.67 (I also unlinked the h and w for this cut). For the "bats" I used the larger border on page 54, flipped the image upside down and cut one at 3.25 x 1.15 and another one at 2.06 x 0.73. The 2nd layer for the bats are from page 72. These were cut at 3.42 x 1.91 and another one at 2.14 x 1.20. Then I layered them with 3D dots for dimension.


I FINALLY got to use my i-Rock to give the bats eyes, and the pumpkins some bling! I also added some black tool, and stamped "boo" with CTMH stamps.

Paper Recipe:
Base-Kraft paper from JoAnns
Frame-Making Memories Halloween paper
Pumpkins and Moon-My Mind's Eye photo stack
Outline of Pumpkins-SU's Pumpkin Pie
Bats-Bazzill


I hope you enjoyed this Halloween inspired card using French Manor! Happy card making to all of you!

Saturday, October 2, 2010

Happy Birthday...

to my dear friend Shannon!
Here is a card that I made for her:
This is the first time that I made a card this size! I LOVE it! It all started with the SU stamp "happy birthday with a cherry on top!" Right away I thought of the Sweet Treats cartridge. I knew that this ice cream sundae needed to be cut BIG! I looked around in my envelope stash and found all the extra envelopes from last years Christmas photo cards...PERFECT!
The "pink" for the base of the card was cut at 8" x 8", then scored at 4", and then folded in half.
 The sundae and all its layers was cut (from the Sweet Treats cart page 30) at 7". I ran the cherry through my Xyron upside-down and then "sugared" it with glitter. I used the Cuttlebug folder Divine Swirls on the whipped cream. I covered the chocolate syrup with Glossy Accents {this gave it a SLICK look} let it dry, and then added the sprinkles covered in Stickles.
 I used Glue Dots and added 2 Pinkpaislee tickets that I had stamped on and added Stickles to the images. The tool is from a local scrapbook store, and the ribbon is American Crafts. For me, more is always better, so I added a pearl pin. I bought a box of these pins at the W in the quilting section, and then used my file to file off the sharp tip.

 Paper Recipe:
Base-SU's Pretty in Pink
Background pattern paper-Me and My Big Idea's stack
Silver-Recollections "Shimmery"
Cherry, ice cream, and whipped cream-all from my scrap stash
Chocolate syrup-SU's Chocolate Chip
Stamps and ink-SU
Here it is with her gifts. I even wrapped the gifts to match! I thought that it turned out super cute! I have to tell you that it took all I had not to keep these gifts! ;) I wanted to sooooo bad! {She LOVED all of it!}
Thanks for stopping by today! I hope you and I both get some time to craft this weekend!

Tuesday, September 28, 2010

The Gala layout

Remember that She's a Sassy Lady guest designer post that I did a while back? The one where I showed you how I add more pictures to my pages?

I used Fabulous Finds "hinges." You can click HERE if you missed that post.
 This layout has been sitting on my door for weeks, and 90% of it has been done! Well, I finally found a couple of minutes the other night and finished it! Drum roll please............
This is definitely a more clean and simple layout for me, but I like it! 
I used my Gypsy to plan the layout and then moved the pieces to different tabs in order to cut them by color.
I also used my gypsy to weld the letters (from Lyrical Letters) together for the title and the date.


The flowers and border are from the Gypsy wanderings. I cut multiple flowers so that I could layer them for more dimension. I also added a little bling to the middle of each flower.


On the second page of my layout you can see that I was able to put "5" pictures just on this one spot!


For my journaling I made a text box in Word, changed the background to black, and then changed the text color to white.


Paper Recipe:
*The Black and the White shimmery background paper-Recollections
*Silver shimmery-Recollections
*Purple-DCWV
*Pattern background paper for the "small picture holders"-Me & My Bid Ideas paper pack

Sorry it took so long to post this LO, but I hope you enjoyed it! Have a great day all my crafty friends! ;)

Sunday, September 26, 2010

Giving Thanks!

...This is something that I need to remember to do, daily! There are so many things that I am thankful for: my fantastic husband, my fabulous friends, but mostly {sorry honey} my little Stinkerbella! She is an absolute blessing, that has had obstacles around every corner. The journey to her, and the adoption process has taught my husband and I that we need to give "Thanks," to God, daily!
This is a quick page that I put together for Stinkerbella's 1st Thanksgiving. She fell asleep inside the Peanut Shell (the sling that I am wearing). I had my hand on the outside, and as she was sleeping she reached out and grabbed my finger! My "sister" said, "We have to have a picture of that!" I'm glad she captured this precious moment!
The title was cut using the Cricut Lite cart, Celebrate with Flourish. When I saw this title I knew it was perfect for this layout!  I added 3D dots to "pop" it up.
The acorns were cut using the Create a Critter cartridge. I also embossed the bottom part of the acorn with the Cuttlebug "Diamonds in the Rough" folder. Then I added some twine {thanks Cerin!} to the top of each one by wrapping and tying a knot. I also stuck a piece of tape on the back of each acorn to hold the twine in place. Then I added 3D dots to each acorn, I layered 1 on some and 2 on the others.
I cut another flourish from the Home Decor cartridge to mimic the title, and add a little more color to the layout. I finished off the layout with rub-ons from CTMH, and some {bling} of course on the title!

The paper recipe:
*Background paper-DCWV neutral stack
*Striped paper on title-Making Memories Chelsea's Place
*Shimmery paper for the acorns-Bazzill
*All other paper-scraps from DCWV

I have to apologize for not having "cut" sizes! I did this layout a few weeks ago at a crop and I didn't write down the sizes. I think the acorns were cut at 3" and 5". I promise to be better at keeping track! I'm just proud of myself for having something to post! ;)
Have a crafty kinda day!

Tuesday, September 21, 2010

Guest Designer Day at She's a Sassy Lady!

{This is my guest designer post for She's a Sassy Lady}

Hi everyone this is Kristy from craftin on my door, and I love to "spruce" things up. I like to find things, craft away, and make them my own creations!

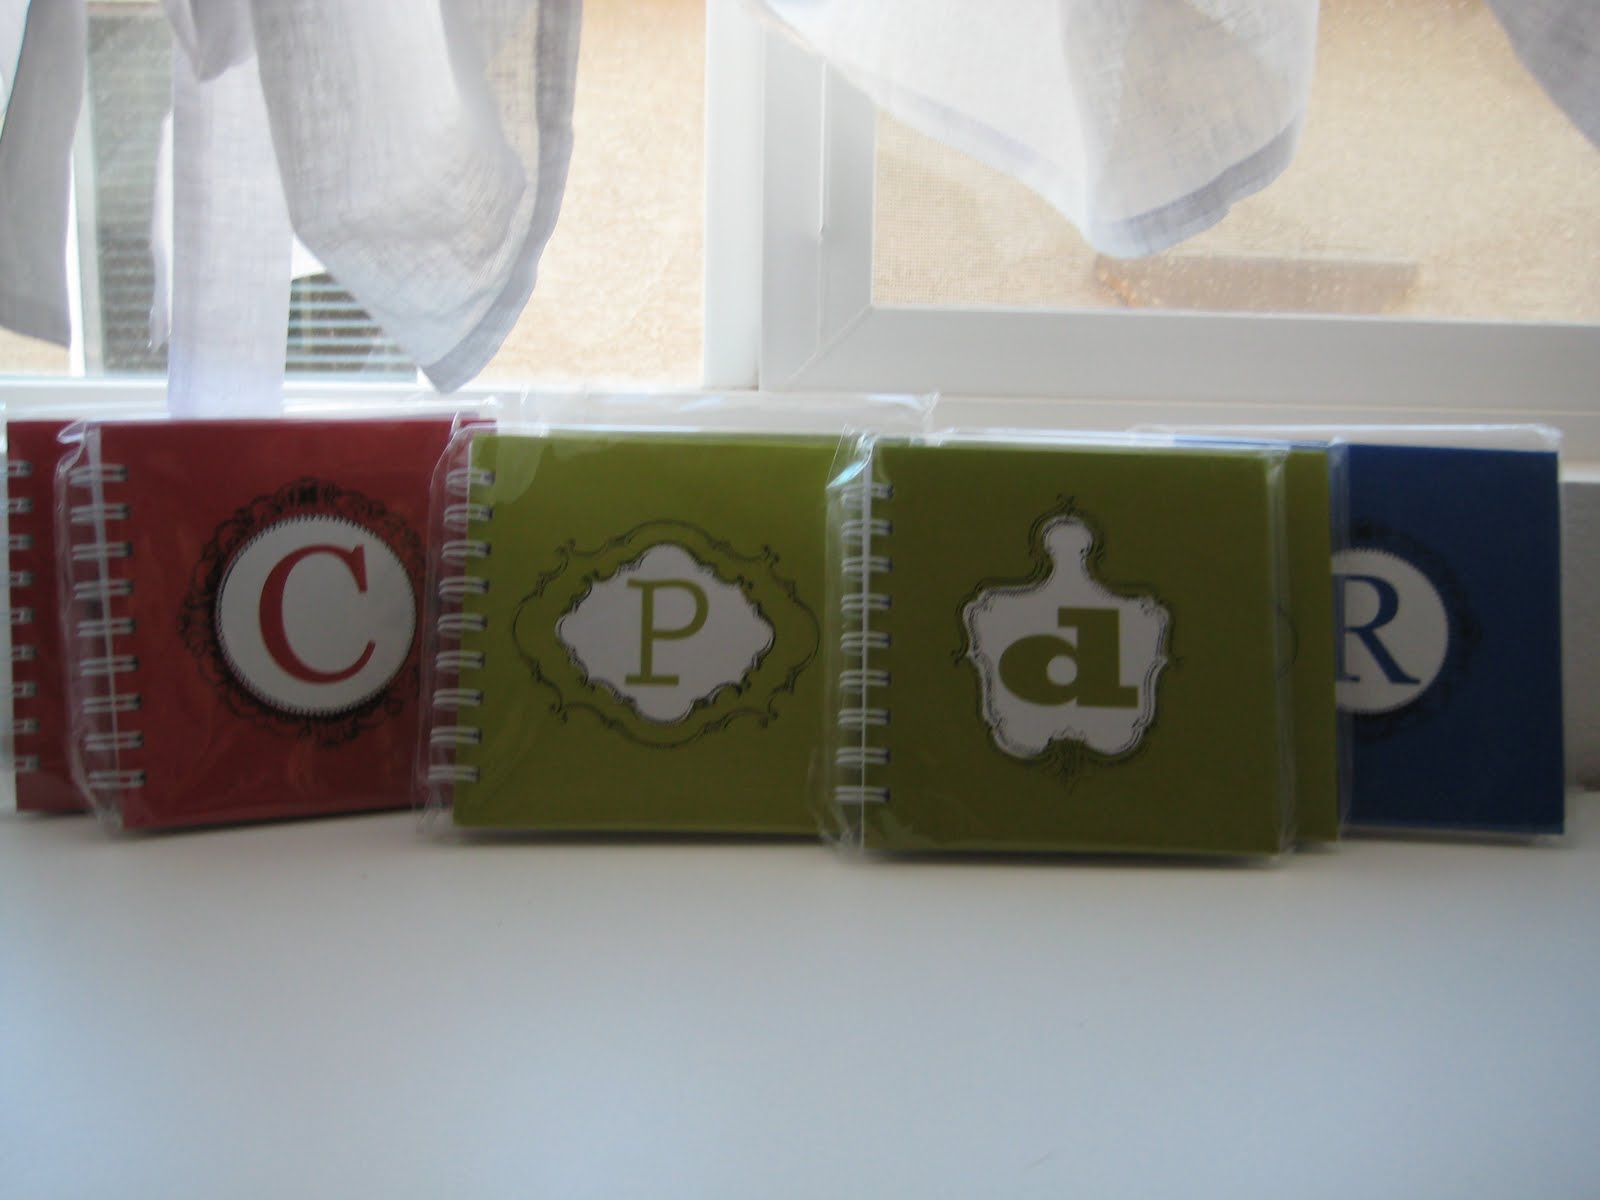
I'm a teacher and at the beginning of each year I look for something to make for the other teachers on my team and a few extra friends. This year I found these in the dollar bin at Michaels:
They are perfect to keep track of parent phone calls or communications. I liked the colors of the little notebooks, but they did not have the right initials on them. Here comes the "sprucing!" Before I show you what they look like now, I have a little back story for you. Do you ever get a little frustrated with someone at work or home? Do you ever just have "one of those days?" Well, when I have repeated myself 3, 5, or more times, or get a little frustrated with a co-worker I just say a little word that puts a smile on my face. I shared this with my team and friends and we help each other out by saying this word to each other. The word is "cupcake!" Try it next time, and you will see. :) I must have said this a ton last year, because when one of my kindergartners was asked, "What's something that Mrs. Luccketta says a lot?" He said, "cupcake!" (It's in the end of the year scrapbook they made for me.) Back to crafting, here's what they turned into with a little "sprucing" from me:
Of course I had to make one for myself, too!
I started by using kraft paper from JoAnns and my trusty Gypsy.
I used a scallop square from Mini Monograms and made the height 5.29". Then I picked up a circle from Accent Essentials and made the height .55". I put a circle in each scallop and then welded it together. Next, I used the "duplicate" button to make as many as I needed to cut.
I then used a DCWV paper pack to cut out the rounded corner squares. This square is from Slumber Party (it is a charm layer) and the height is 3.78".
Next, I used Feeling Groovy and DCWV glitter paper to cut out the names that I had welded.
One of my fav cartridges right now is Rock Princess, and that's where I got this adorable cupcake with crossbones! The cupcake and crossbones are on page 77.
*Cupcake and bones-2"
*Frosting- 2 1/4" (I liked the way it layered better)
*Liner-2 1/4" and then I ran it through my crimper
*I wanted to give the cherry more dimension and make it bigger so I used the "layer2" feature and cut them at 5 3/4" with red glitter paper.
I tied twine around the liner part of the cupcake and then used 3D dots to "pop" the cupcake on the crossbones.
The names, frosting, and cherries are all cut on glitter paper. I wish you could see how sparkly they are, but the pics just don't do them justice! ;)
 
I hope you liked my little "sprucing" up project (my team and friends LOVED them!). Thank you Sheila for allowing me to be a guest designer today! Please hop on over to my blog anytime: craftin-on-my-door.blogspot.com

Happy craftin' to all! ;) Kristy

Monday, September 20, 2010

HEELLLLLOOOOOOO!

Hello all my crafty friends! Yes, I am alive just SUPER busy! Thank you for all of your concerns! School has started and there just doesn't seem to be enough time in the day! The construction on our school was finally finished (the week before school started!), and our classrooms had to be totally packed up and then unpacked. On top of that I moved from kindergarten to second grade! I am now getting into the rhythm of second grade and LOVING it! The two other teachers that I work with (my team) are AMAZING! I am soooooo lucky! Being in second grade there are a lot more papers to grade and things to do. It seems that I bring a lot home nightly, but I'm still trying to balance my time with little Stinkerbella (whom has grown "one" vampire fang!). There's just not a lot of time at night for the blog world, but I promise that I am working on that! I am hoping to get somethings done on the weekends and pre-post them. Thanks for hanging in there with me! I really need a craftin' day soon! Anyone in the Vegas area want to get together?!

p.s. I will be guest designing for She's a Sassy Lady tomorrow. A little something I whipped up for my fab team and a couple extra friends!