Today's my day to be the guest designer over at She's a Sassy Lady. If you have a moment please hop on over and leave me a comment. Here's my post:
Hi everyone! This is Kristy from craftin-on-my-door and I want to thank Sheila for allowing my to be her guest designer again today! I look forward to my monthly She's a Sassy Lady posts!
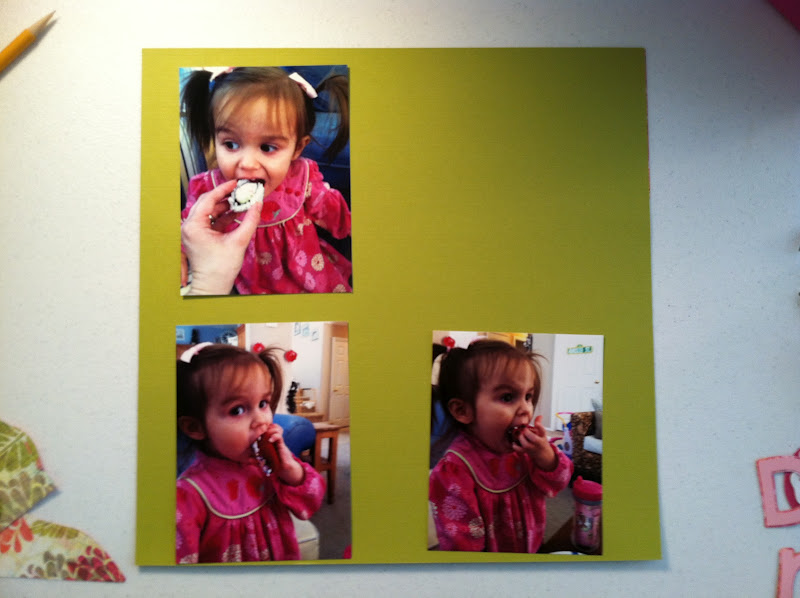
Today I have step by step pictures of how I put a layout together. These pictures just crack me up! Little Stinkerbella likes to do certain things. For example, whenever she has a doctor's appt. and has to get shots I let her pick what and where she would like to go for lunch. The past two times she has picked sushi and donuts! Of course I had to preserve these memories! ;)
I started by placing my 3 photos onto the page.
The background piece for the title is from Graphically Speaking and was cut at 6.74" in width and 6.50" in height. Then I tied twine around it and attached it to the page. I also picked which Kiwi Lane Design templates I wanted to place onto my page.
I took one template off at a time and traced them onto my papers. For the grey shadow, I traced the template, cut it out, and then cut it down the middle.
For the title the word "Sushi" is from the MS Birthday Cake cart and was cut at 2.25". The word "Donuts" was cut from the Birthday Bash cart at 2". I thought it would be cute to have the "o" in donut be made out of a donut! The donut is from Slumber Party, was cut at 2.25", I also added some Glossay Accents to the frosting, and used foam adhesive to pop it up. The "&" sign is from Sugar and Spice and was cut at 7.15".
Then, I attached the title onto the page.
Next, I attached the pictures onto the page and used a fun SU punch to add a tab to one of my pics.
I used a mixture of rub-ons to put the date onto my page.
I also used a grey marker to add some journaling, straight to the page.
I also added some small round stickers that said, "YUM!" to the tab.
Thanks for stopping by today! I hope you all get some scrapping time this week! ♥Kristy
Showing posts with label birthday bash. Show all posts
Tuesday, April 17, 2012
Sunday, January 22, 2012
Little Stinkerbella's 2nd B-day!
We celebrated Little Stinkerbella's 2nd B-day and it was all things ELMO! I know I promised pictures in November and am sorry that I haven't posted these sooner!! Here we go...
the invites:
For the banner I used multiple Cricut carts...Birthday Bash, Elmo's Party, Formal Occasions, and I printed all the red and white polka dot paper using my Imagine and the Imagine More Cards cart!)
The mantle (I made the tissue paper pom poms and even added some tulle. I also placed a scrapbook page of Stinkerbella and Elmo on the mantle. The subway art is from the fabulous ladies at eighteen25):
This was a little sign I made for the sweets table and to cover up our thermostat ;)
The sweets table:
Goldfish (because Elmo loves his goldfish!), strawberry milkshake whoppers, chocolate covered oreos with "A's" and "2's" piped on them, graham cookies, licorice, and cupcakes oh my!
I also made homemade butter cream with lots of vanilla! I piped the butter cream onto the cupcakes using a large ziplock bag. The little Elmo toppers I found at Party City.
I found little white cups in the baking section at Michael's and I used some at the sweets table for the kiddos to scoop their sweets into, and I used some to pre-scoop the ice cream. This way all I had to do was pull them out of the freezer and place a cupcake and a cup of ice cream onto a plate (it was a BIG time saver!)
Here are the goody bags:
I placed them in cute little pink bins by the front door so that the guests could grab them on the way out.
I had to add a little something to her chair ;)
It was a fun party and Little Stinkerbella had a BLAST! (FYI, this cute little dress I ordered off of Etsy at Carriecreations. It was just adorable and helped to "make" the party!) Thanks for stopping by today, and thanks for being so patient ;) ♥Kristy
the invites:
Here's a sign I made for the front door:
Here's Little Stinkerbella as I am decorating. She loved her Elmo banner!For the banner I used multiple Cricut carts...Birthday Bash, Elmo's Party, Formal Occasions, and I printed all the red and white polka dot paper using my Imagine and the Imagine More Cards cart!)
The mantle (I made the tissue paper pom poms and even added some tulle. I also placed a scrapbook page of Stinkerbella and Elmo on the mantle. The subway art is from the fabulous ladies at eighteen25):
This was a little sign I made for the sweets table and to cover up our thermostat ;)
The sweets table:
Goldfish (because Elmo loves his goldfish!), strawberry milkshake whoppers, chocolate covered oreos with "A's" and "2's" piped on them, graham cookies, licorice, and cupcakes oh my!
I decided to make the cupcakes myself this year. I ordered these little baking cups from Shop Lulu. Then I made some strawberry and some confetti cake cupcakes.
I also made homemade butter cream with lots of vanilla! I piped the butter cream onto the cupcakes using a large ziplock bag. The little Elmo toppers I found at Party City.
I found little white cups in the baking section at Michael's and I used some at the sweets table for the kiddos to scoop their sweets into, and I used some to pre-scoop the ice cream. This way all I had to do was pull them out of the freezer and place a cupcake and a cup of ice cream onto a plate (it was a BIG time saver!)
Here are the goody bags:
I placed them in cute little pink bins by the front door so that the guests could grab them on the way out.
I had to add a little something to her chair ;)
It was a fun party and Little Stinkerbella had a BLAST! (FYI, this cute little dress I ordered off of Etsy at Carriecreations. It was just adorable and helped to "make" the party!) Thanks for stopping by today, and thanks for being so patient ;) ♥Kristy
Friday, November 4, 2011
Little Stinkerbella's b-day...invites
A friend of mine found this on Pinterest and tagged me...I just {LOVE} this because this is exactly what we have been telling Little Stinkerbella since we brought her home from the hospital!
I can't believe that 2 years ago on Saturday a woman gave my husband and I her baby, to raise as our own! This little baby has made our house into a home and changed just a husband and wife into a FAMILY! I am forever grateful and blessed! Wishes and prayers do come true! God is truly amazing!
I can't believe that my Little Stinkerbella is going to be 2!!!! She loves all things Elmo, so an Elmo party it is! Here are the invites that I put together:
Here's a sneak peek of some of the Elmo decor...
Of course I'm doing a lot of the party goods myself, I did order a couple of things and found the cutest little dress for her on Etsy! Can't wait to show you all the pictures...more to come after Little Stinkerbella turns 2! ♥ Kristy
I can't believe that 2 years ago on Saturday a woman gave my husband and I her baby, to raise as our own! This little baby has made our house into a home and changed just a husband and wife into a FAMILY! I am forever grateful and blessed! Wishes and prayers do come true! God is truly amazing!
I can't believe that my Little Stinkerbella is going to be 2!!!! She loves all things Elmo, so an Elmo party it is! Here are the invites that I put together:
Here's a sneak peek of some of the Elmo decor...
Of course I'm doing a lot of the party goods myself, I did order a couple of things and found the cutest little dress for her on Etsy! Can't wait to show you all the pictures...more to come after Little Stinkerbella turns 2! ♥ Kristy
Thursday, September 15, 2011
Happy BIrthday...
to my hubby! Today is the hubster's bday so Little Stinkerbella and I put this card together for him. I used my super fabulous Imagine (have I told you how much I love this thing?! Wait until you see the layout I did using it, in only about an hour!), the Imagine More cart, and the Birthday Bash cart. I've shared the story before that some friends close to our family call my hubby "Squirrel." So I thought that this would make a perfect card! This is a 5 x 7 card. The squirrel and layers were cut at 4.5". The little bday banner was cute at 2.8", and the large brown circle was cut at 4.9".
I used foam adhesive to add dimension, and added a small brown circle behind the sentiment. This little banner is actually from the llama page (41). Then I added a little twine to the bottom of the card.
Stinkerbella wanted to add her 2 cents and color inside. Of course I let her. Would you be able to say no to that little face? I love how she took her job so serious! She kept saying, "I color for daddy." So precious!
Thanks for stopping by today and Happy Birthday to the best Daddy and Hubby ever! We love you! <3Kristy
I used foam adhesive to add dimension, and added a small brown circle behind the sentiment. This little banner is actually from the llama page (41). Then I added a little twine to the bottom of the card.
Stinkerbella wanted to add her 2 cents and color inside. Of course I let her. Would you be able to say no to that little face? I love how she took her job so serious! She kept saying, "I color for daddy." So precious!
Thanks for stopping by today and Happy Birthday to the best Daddy and Hubby ever! We love you! <3Kristy
Subscribe to:
Posts (Atom)