
Hi everyone! This is Kristy from craftin-on-my-door and I want to thank Sheila for allowing my to be her guest designer again today! I look forward to my monthly She's a Sassy Lady posts! Today I thought that I would give you a quick and easy project to make and present to those {you are so "lucky" to have in your life}! And it's just in time for St. Patty's Day! I have to give credit where credit is due...I saw this idea posted on the eighteen25 girls page (they are adorable), and I thought hmm....these are cute but what can I change and add with my trusty Cricut?!
Here's what I came up with:


*treat bags (I got mine at Michaels)
*cardstock
*twine
*buttons
*flowers
*bling
*Microsoft Powerpoint or a photoshop program
*a cartridge with a shamrock on it (I used April Showers and then hid the smiley face with my Gypsy)
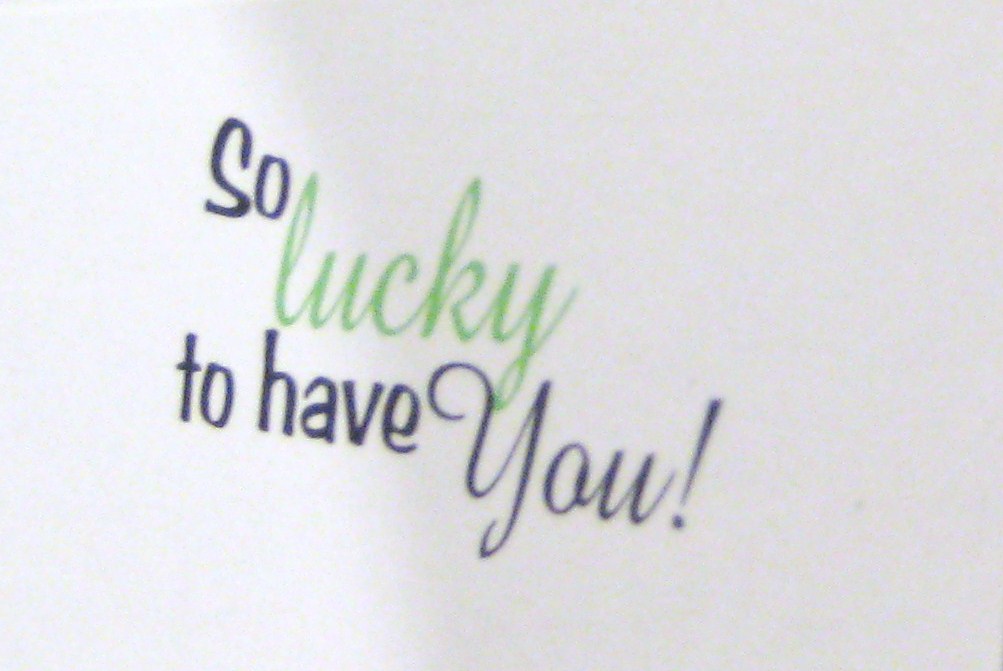
First, I opened up my Powerpoint program and found two different fonts that I liked. I chose ArabBruD, and Amaze. Then, I made a text box for "you" and placed it in the bottom corner. Next, was a text box for "to have," and I placed it next to the "you." Then, I did another text box for "lucky," I changed the color to green and sized it larger than the other words. Lastly, I made a text box for "so," and placed it next to the lucky.
(I tried to download the file, but it did not show up properly on box.net-sorry!)


6 comments:
These are TOTALLY awesome Kristy -- OMGOODNESS I love them. I think I may scraplift this for Spencer's friends at his day school. Thanks for the wonderful idea. Of course I will post on my blog and give you the credit....yeeeee haawwww! :)))
♥Tracy
Love it! You always do such fun stuff! Keep up the good work! I will see you Saturday! :)
Love your design today is is just so 'SWEET' and they will just love the treat! Thanks for sharing this great design and tutorial with us at Shes A Sassy Lady!
SO Fun! What a great gift bag! :) Thanks for playing along at Cupcake Inspirations this week!
I love this! So fun!!
I featured your treat bag on my blog today, feel free to stop by & check it out:
http://www.artsyfartsymama.com/2012/03/pinteresting-features-n-shtuff-25.html
Hello thanks for posting this
Post a Comment