Here's a quick layout I did of Little Stinkerbella, and one of my best friend's kiddos playing at the park. We even ran into another friend and his daughter while we were there! I used some of my favorite Echo Park papers and Kiwi Lane Design templates to put this layout together.
Thanks for stopping by today! ♥Kristy
Showing posts with label Kiwi Lane Designs. Show all posts
Wednesday, May 16, 2012
Tuesday, April 17, 2012
Sushi & Donuts layout...
Today's my day to be the guest designer over at She's a Sassy Lady. If you have a moment please hop on over and leave me a comment. Here's my post:
Hi everyone! This is Kristy from craftin-on-my-door and I want to thank Sheila for allowing my to be her guest designer again today! I look forward to my monthly She's a Sassy Lady posts!
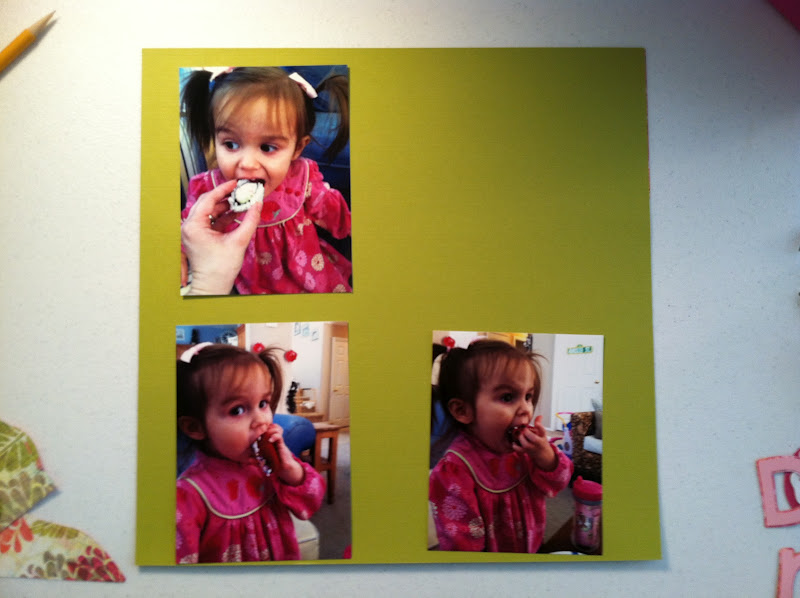
Today I have step by step pictures of how I put a layout together. These pictures just crack me up! Little Stinkerbella likes to do certain things. For example, whenever she has a doctor's appt. and has to get shots I let her pick what and where she would like to go for lunch. The past two times she has picked sushi and donuts! Of course I had to preserve these memories! ;)
I started by placing my 3 photos onto the page.
The background piece for the title is from Graphically Speaking and was cut at 6.74" in width and 6.50" in height. Then I tied twine around it and attached it to the page. I also picked which Kiwi Lane Design templates I wanted to place onto my page.
I took one template off at a time and traced them onto my papers. For the grey shadow, I traced the template, cut it out, and then cut it down the middle.
For the title the word "Sushi" is from the MS Birthday Cake cart and was cut at 2.25". The word "Donuts" was cut from the Birthday Bash cart at 2". I thought it would be cute to have the "o" in donut be made out of a donut! The donut is from Slumber Party, was cut at 2.25", I also added some Glossay Accents to the frosting, and used foam adhesive to pop it up. The "&" sign is from Sugar and Spice and was cut at 7.15".
Then, I attached the title onto the page.
Next, I attached the pictures onto the page and used a fun SU punch to add a tab to one of my pics.
I used a mixture of rub-ons to put the date onto my page.
I also used a grey marker to add some journaling, straight to the page.
I also added some small round stickers that said, "YUM!" to the tab.
Thanks for stopping by today! I hope you all get some scrapping time this week! ♥Kristy
Hi everyone! This is Kristy from craftin-on-my-door and I want to thank Sheila for allowing my to be her guest designer again today! I look forward to my monthly She's a Sassy Lady posts!
Today I have step by step pictures of how I put a layout together. These pictures just crack me up! Little Stinkerbella likes to do certain things. For example, whenever she has a doctor's appt. and has to get shots I let her pick what and where she would like to go for lunch. The past two times she has picked sushi and donuts! Of course I had to preserve these memories! ;)
I started by placing my 3 photos onto the page.
The background piece for the title is from Graphically Speaking and was cut at 6.74" in width and 6.50" in height. Then I tied twine around it and attached it to the page. I also picked which Kiwi Lane Design templates I wanted to place onto my page.
I took one template off at a time and traced them onto my papers. For the grey shadow, I traced the template, cut it out, and then cut it down the middle.
For the title the word "Sushi" is from the MS Birthday Cake cart and was cut at 2.25". The word "Donuts" was cut from the Birthday Bash cart at 2". I thought it would be cute to have the "o" in donut be made out of a donut! The donut is from Slumber Party, was cut at 2.25", I also added some Glossay Accents to the frosting, and used foam adhesive to pop it up. The "&" sign is from Sugar and Spice and was cut at 7.15".
Then, I attached the title onto the page.
Next, I attached the pictures onto the page and used a fun SU punch to add a tab to one of my pics.
I used a mixture of rub-ons to put the date onto my page.
I also used a grey marker to add some journaling, straight to the page.
I also added some small round stickers that said, "YUM!" to the tab.
Thanks for stopping by today! I hope you all get some scrapping time this week! ♥Kristy
Sunday, February 19, 2012
I just have to share...KLD!
Hello my crafty friends! Like I said in my previous post, I've been able to get a little scrappin' done while my Little Stinkerbella naps. I did the following pages using the fabulous Kiwi Lane Design templates!
I used Clara Lane, large brackets, small brackets, scallops, and wildflower. I put together these layouts for their February challenge. Guess what I found in my email this morning...
| |||||||||
This is for one day only! I have to say that these templates make scrapbooking a snap! It's so nice to "frame" out your page and know what it's going to look like! These are great for veteran and novice scrappers alike! If you have any questions, I'd love to answer them for you! ;) Thanks for stopping by! ♥ Kristy
Friday, February 10, 2012
Kiwi Lane Designs Sale!!!!
If you are a scrapbooker or crafter you will {love} Kiwi Lane Designs! Now's the time to stalk up on their amazing products!!!!
Special Promotion!..... Feb 10-14th The Complete Bundle will be 30% off instead of 25% off during the 4 day Online Show Special! Plus use coupon code SHIP20 to receive FREE Shipping! The price in the shop already reflects the 30% off discount for the complete bundle. Happy Shopping! Kiwilane.com
***Please put my full name (Kristy Luccketta) in the comments box when you order! And then pass on this fabulous deal to a friend and have them put your name in the comment box so that you can get a free DT set!!!! What are you waiting for?! Jump on over to Kiwilane.com and check out their fabulous products!
Thanks for stopping by today! ♥ Kristy
Special Promotion!..... Feb 10-14th The Complete Bundle will be 30% off instead of 25% off during the 4 day Online Show Special! Plus use coupon code SHIP20 to receive FREE Shipping! The price in the shop already reflects the 30% off discount for the complete bundle. Happy Shopping! Kiwilane.com
***Please put my full name (Kristy Luccketta) in the comments box when you order! And then pass on this fabulous deal to a friend and have them put your name in the comment box so that you can get a free DT set!!!! What are you waiting for?! Jump on over to Kiwilane.com and check out their fabulous products!
Thanks for stopping by today! ♥ Kristy
Thursday, September 1, 2011
Anything Goes Blog Hop
Welcome to the Anything Goes Blog Hop celebrating the one year Blog Birthiversary of our hostess Stephanie from Once upon a Paper. You should have come here from Stephanie from Once upon a Paper. If not you can start at the beginning of the hop at Once upon a Paper. Stephanie is celebrating her Blog Birthiversary with Seven Days of Giveaways so make sure you check it out each day for the next week.
A friend of mine gave Little Stinkerbella these adorable shoes, when she was first born. I {loved} these little shoes and just had to capture this memory! I also loved these pictures because it looked like Stinkerbella was telling one of our dogs, Hope, to "check out" her new shoes!
I love my Kiwi Lane Designs templates and wanted to try using them in another way. I used the tiny brackets to make a perfect background for my large title. I did this by tracing around 3 sides of the bracket and then flipping the bracket over and tracing the 3 side again.
I did the same thing with another one of the tiny brackets, this time on the back of my patterned paper.
Next, I traced around a piece of light pink paper to add to the background and then I glued them together.
The light pink paper was a little larger then I wanted it to be so I just trimmed it down.
Here they are all glued together. I even add a little doodling onto the white background.
I used the Paisley cartridge to cut out a shoe.
The phrase "stylin'" is also from Paisley, and then I added some doodling to the white shadow.
I added some tulle behind the shoe. I also wanted to add some little crocheted flowers to mimic her little shoes. I have never crocheted before so PLEASE don't looked closely! ;) (I found the directions online!)
I love my Kiwi Lane Designs templates and wanted to try using them in another way. I used the tiny brackets to make a perfect background for my large title. I did this by tracing around 3 sides of the bracket and then flipping the bracket over and tracing the 3 side again.
I did the same thing with another one of the tiny brackets, this time on the back of my patterned paper.
Next, I traced around a piece of light pink paper to add to the background and then I glued them together.
The light pink paper was a little larger then I wanted it to be so I just trimmed it down.
Here they are all glued together. I even add a little doodling onto the white background.
I used the Paisley cartridge to cut out a shoe.
The phrase "stylin'" is also from Paisley, and then I added some doodling to the white shadow.
I added some tulle behind the shoe. I also wanted to add some little crocheted flowers to mimic her little shoes. I have never crocheted before so PLEASE don't looked closely! ;) (I found the directions online!)
Today I'm giving away a set of Kiwi Lane Designs Tiny Brackets. These are great for journaling and adding just the right touch to your layouts or cards! In order to win please be a follower and leave a comment by Friday night. The winner will be announced on Monday!
In Case you get lost here is the rest of the line-up:
Stephanie from Once upon a Paper @ http://onceuponapaper.blogspot.com/
Kristy from Craftin’ on my Door @ http://craftin-on-my-door.blogspot.com/
Txscrappermom @ http://www.txscrappermom.blogspot.com/
Scraplette from Around the Block with Scraplette @ http://scrapalette.blogspot.com/
Renee from I Came, I Saw, I Created @ http://icameisawicreated.blogspot.com/
Michele from Green Girl Scraps @ www.michelegreen.com
Ali from Scrapping with Alicat @ http://scrappingwithalicat.blogspot.com/
Carla from OCD Scrapology @ http://ocdscrapology.blogspot.com/
Amber from My 3 E Scrapbooking @ http://my3escrapbooking.blogspot.com/
Cassie from Scrappin’ Palace @ 2 http://scrappinpalace.blogspot.com/
Thanks for stopping by today! <3Kristy
Tuesday, July 19, 2011
Make your own flower embellishments!
Today's my day to be the guest designer over at She's a Sassy Lady. If you have a moment please hop on over and leave me a comment. Here's my post:
Hi everyone! This is Kristy from craftin-on-my-door and I want to thank Sheila for allowing my to be her guest designer again today! I look forward to my monthly She's a Sassy Lady posts!
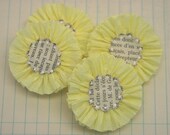
I was at a scrapbook store and saw some fun crepe paper flower embellishments, and I thought..."I can make those!" They looked kind of like this:
I decided to make mine more like roses, add some tulle, and some bling of course! Here are mine:
They were very easy to make, and all you need are some supplies.
First, punch some circles from card stock. The size you punch will be just a smidge smaller than your flowers. I did 2 different sizes.
Next, take the crepe paper and make a small ball. (There are a few different ways to make these flowers, and they each make different dimension.)
1. Twist the crepe paper around the small ball, and turn/roll the flower while twisting.
2. Scrunch the crepe paper while twisting around.
3. Twist, turn/roll, then scrunch...
When you get to the size you want just cut the crepe paper and fold under the flower. Add some hot glue to the card stock circles, and still that sucker down! ;)
Then, cut pieces of tulle (and cut each piece of tulle in half) and tie it in the middle with a small piece of twine. Cut pieces of ribbon and attach with twine. Again add more hot glue on the back and attach.
I also used my Kiwi Lane Design "brackets" for this layout. I just ordered and received the small brackets and they are perfect for journaling next to pictures! (By the way, they are having a 50% off sale right now!)
I had these pictures and idea for the layout for a while, but finally had time to sit down and put it all together! The story behind this layout is a cute one. One of our dogs, Hope, has just {LOVED} Little Stinkerbella ever since we brought her home. I think that she thinks she is her little puppy! When Stinkerbella was very tiny and I would prop her up on the couch to change her or take a picture, Hope would jump up onto the couch and put her paw or puppy face over Stinker's lap. We always called this a "Hope seat-belt!" Here is the final layout:
Did you notice the difference between the rolled roses and the scrunched roses? One last peek at the handmade flower embellishments:
Thanks for stopping by today! I hope you all take a few moments to make some embellishments of your own, and if you do {please} pop on over to my blog and leave me a comment/link so that I can check them out!
<3 Kristy
Hi everyone! This is Kristy from craftin-on-my-door and I want to thank Sheila for allowing my to be her guest designer again today! I look forward to my monthly She's a Sassy Lady posts!
I was at a scrapbook store and saw some fun crepe paper flower embellishments, and I thought..."I can make those!" They looked kind of like this:
I decided to make mine more like roses, add some tulle, and some bling of course! Here are mine:
They were very easy to make, and all you need are some supplies.
First, punch some circles from card stock. The size you punch will be just a smidge smaller than your flowers. I did 2 different sizes.
Next, take the crepe paper and make a small ball. (There are a few different ways to make these flowers, and they each make different dimension.)
1. Twist the crepe paper around the small ball, and turn/roll the flower while twisting.
2. Scrunch the crepe paper while twisting around.
3. Twist, turn/roll, then scrunch...
When you get to the size you want just cut the crepe paper and fold under the flower. Add some hot glue to the card stock circles, and still that sucker down! ;)
Then, cut pieces of tulle (and cut each piece of tulle in half) and tie it in the middle with a small piece of twine. Cut pieces of ribbon and attach with twine. Again add more hot glue on the back and attach.
I curved some of the tulle so that the embellishments would work perfect on the corners of some of the pictures.
I was on my way to a fantastic Crafty Girls all day crop so I put my pictures, paper, and new embellishments into one of these fabulous scrapping envelopes, and I was ready to go! I got the idea from my SUPER crafty friend, Irene! I had about 10 of these made up and ready, but only got through a few of them.I also used my Kiwi Lane Design "brackets" for this layout. I just ordered and received the small brackets and they are perfect for journaling next to pictures! (By the way, they are having a 50% off sale right now!)
Then, I laid out my pictures and paper.
I wanted to add a little something to one of the important pictures, so I used some Zip glue lines and ruffled some tulle. I didn't bring my tulle with me so I needed to borrow from a friend (isn't that the best thing about going to crops?!), thanks Stephanie! As you can see I also doodled around the brackets, strips, and some of the pictures.I had these pictures and idea for the layout for a while, but finally had time to sit down and put it all together! The story behind this layout is a cute one. One of our dogs, Hope, has just {LOVED} Little Stinkerbella ever since we brought her home. I think that she thinks she is her little puppy! When Stinkerbella was very tiny and I would prop her up on the couch to change her or take a picture, Hope would jump up onto the couch and put her paw or puppy face over Stinker's lap. We always called this a "Hope seat-belt!" Here is the final layout:
Back away from my baby, Lady... (ha ha ha!)
I used my Gypsy for Hope, and seat-belt. "Hope" was cut using Don Juan. For seat-belt I used one of my favorite, go-to fonts for welding which has been the Wild Card cartridge. Did you notice the difference between the rolled roses and the scrunched roses? One last peek at the handmade flower embellishments:
Thanks for stopping by today! I hope you all take a few moments to make some embellishments of your own, and if you do {please} pop on over to my blog and leave me a comment/link so that I can check them out!
<3 Kristy
Subscribe to:
Posts (Atom)